SimVS LP-15 Defibrillator
Guide to the SimVS LP-15 Defibrillator interface and step-by-step procedures for defibrillation, pacing, and cardioversion.
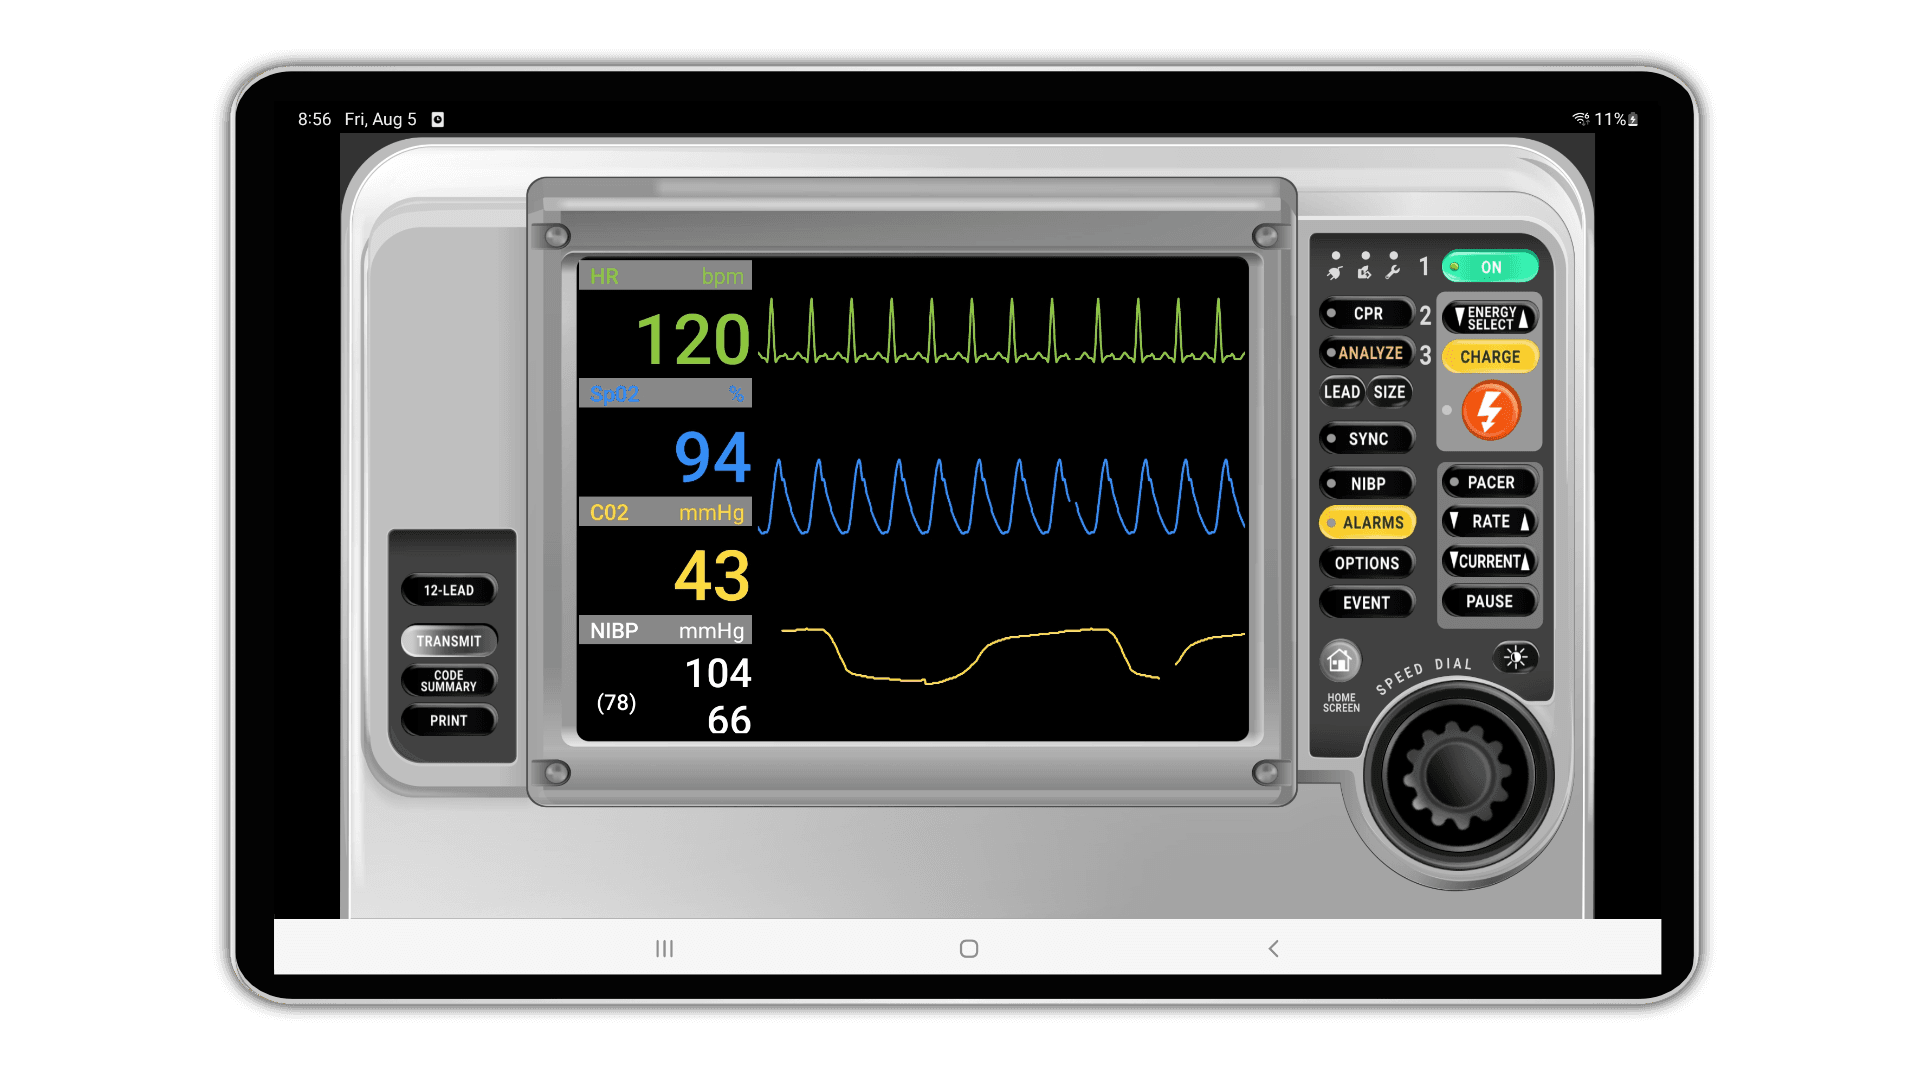
The SimVS LP-15 Defibrillator interface replicates the Physio-Control LIFEPAK 15 monitor/defibrillator with full functionality including defibrillation, pacing, cardioversion, and vital signs monitoring.
Interface Overview
The LP-15 interface is organized into the following areas:
| Area | Description |
|---|---|
| Waveform display | Large waveform traces for ECG, SpO2, and capnography with numeric vital signs (HR, SpO2, CO2, NIBP) |
| Control panel | Right-side buttons — ON, CPR, Energy Select, Analyze, Charge, Shock, SYNC, NIBP, Pacer, Alarms, Options, Event, Rate, Current, Pause |
| Left panel | 12-Lead, Transmit, Code Summary, and Print functions |
| Speed dial | Large rotary dial in the lower-right corner for adjusting energy levels and pacer settings |
Starting the LP-15
Instructor — On the instructor screen, set the system to Defibrillator and press the Go button. Choose the Cardiac Chest Pain scenario.
Student — Select the SimVS LP-15 defibrillator interface and press Go to begin.
Student — Turn on the LP-15 by pressing the ON button in the upper-right corner of the control panel.
Running a Scenario
Instructor — Select Deteriorate 1 to advance the patient to Normal Sinus Rhythm (NSR).
Instructor — Send the rhythm to the student using Run with Changes.
Applying Pads
Select the Leads button on the control panel to place the patient in Pads mode.
Defibrillation
Instructor — Select Deteriorate 2 to induce ventricular fibrillation (V-Fib), then send the rhythm to the student.
Student — Press Energy Select and set the energy to 200 joules (or follow local protocols).
Student — Press Charge and then press the Shock button to deliver the defibrillation.
Pacing
Instructor — Change the rhythm to Sinus Bradycardia and run the changes so the student sees the Sinus Brady rhythm.
Student — Activate the Pacer on the right-hand side of the control panel.
Student — Set the pacing rate to 60 using the speed dial and accept it by pressing the center of the dial.
Instructor — Set the Pacing Capture variable to 70 on the instructor screen.
Student — Increase the amperage (current) using the speed dial up to 70 until electrical capture is achieved.
Cardioversion
Instructor — Select SVT (supraventricular tachycardia) from the available rhythms.
Student — Press the Synchronize button to enable sync mode. Sync markers will appear on the R waves of the ECG.
Student — Select the energy level (e.g., 70 joules) using the speed dial, press Charge, and deliver the shock.
Synchronized vs. Unsynchronized Shocks
Always verify SYNC mode is enabled before cardioverting. In sync mode, the shock is delivered on the R wave to avoid triggering V-Fib. For defibrillation (V-Fib / pulseless V-Tach), SYNC should be off so the shock is delivered immediately.
Related Resources
- SimVS-X Defibrillator — X-Series defibrillator interface reference and procedures
- Scenario Library — browse and launch pre-built clinical scenarios
- Creating Scenarios — create custom scenarios for defibrillator training