Quick Start
Get up and running with SimVS Hospital in minutes — connect devices, launch a monitor, and start your first scenario.
Quick Start
This guide walks you through the basics of SimVS Hospital so you can launch your first simulation in minutes. For detailed setup instructions (WiFi, app install, device pairing), see the Getting Started Guide.
Prerequisites
Before starting, make sure your instructor and student tablets are connected to the same network and paired. See Setup & Licensing if you haven't done this yet.
Instructor Main Screen
When you open the SimVS Instructor app, you'll see the main control screen:
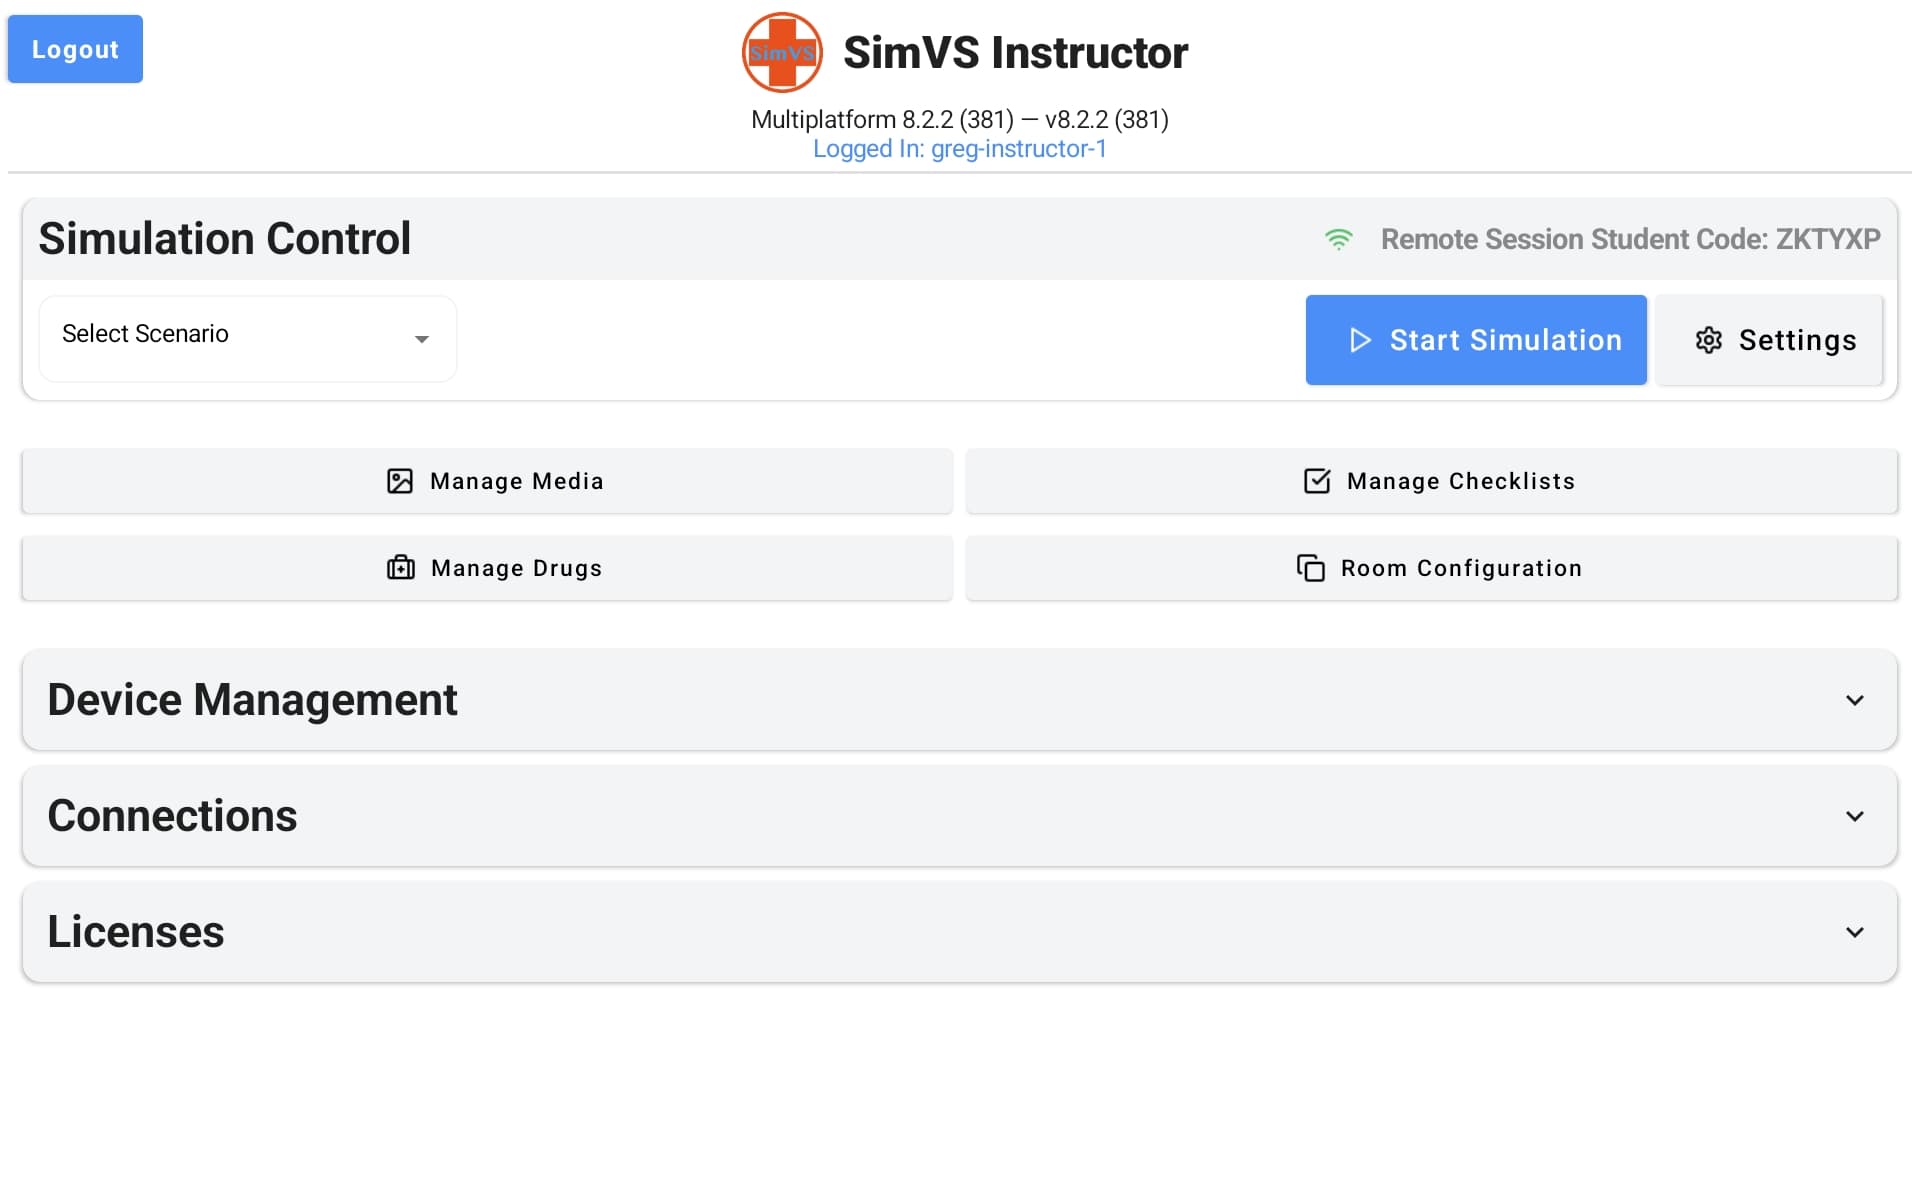
The instructor screen is organized into the following sections:
| Section | Purpose |
|---|---|
| Simulation Control | Select a scenario from the dropdown and tap Start Simulation. The Settings button configures simulation preferences. |
| Manage Media | Organize and send media to students — 12-lead EKGs, custom images, and media folders. See Media. |
| Manage Checklists | Create and manage performance checklists for scoring and debriefing. See Checklists. |
| Manage Drugs | Configure the drug library available during simulations. |
| Room Configuration | Set up the virtual room environment for the scenario. |
| Device Management | View and manage connected student devices. |
| Connections | View connection mode (Server Mode / Router Mode), your Remote Session Student Code, and connected students. |
| Licenses | View active licenses and add new license codes. |
Student Main Screen
The SimVS Student app has a similar layout but is focused on launching monitors and viewing cases:

| Section | Purpose |
|---|---|
| Simulation Control | Select a monitor type from the dropdown and tap Start Simulation. |
| Manage Drugs | View the drug library for the current simulation. |
| Copy Device Id | Copy this device's unique ID for pairing or troubleshooting. |
| Personal Cases | Access scenarios you've saved or created. |
| Assigned Cases | View scenarios assigned to you by an instructor. |
| Connections | Connect to an instructor session using a student code. |
| Licenses | View active licenses and add new license codes. |
Available Monitor Types
The student's Select Monitor dropdown includes all licensed display interfaces:

Available monitors depend on your license. The Hospital Series includes:
- Telemetry — multi-patient telemetry display
- IV Pumps — Universal, Infusomat, Alaris, Sigma, Plum, and PCA pump interfaces
- Nurse Station — nurse call station interface
- X-Series — X-Series defibrillator monitor
Don't see a monitor?
If a monitor type is missing from the dropdown, check your license under Licenses to make sure it's included. See Setup & Licensing for license details.
Launch Your First Simulation
Select a Scenario (Instructor)
On the instructor tablet, tap the Select Scenario dropdown and choose a category — for your first run, select Nursing.

The Scenario Library shows all available scenarios in the selected category:

Select a scenario (e.g., ADULT CHEST PAIN) to load it.
Select a Monitor (Student)
On the student tablet, tap Select Monitor and choose the display interface that matches your scenario — typically Hospital Monitor for nursing scenarios or X-Series for defibrillator scenarios.

Start the Simulation
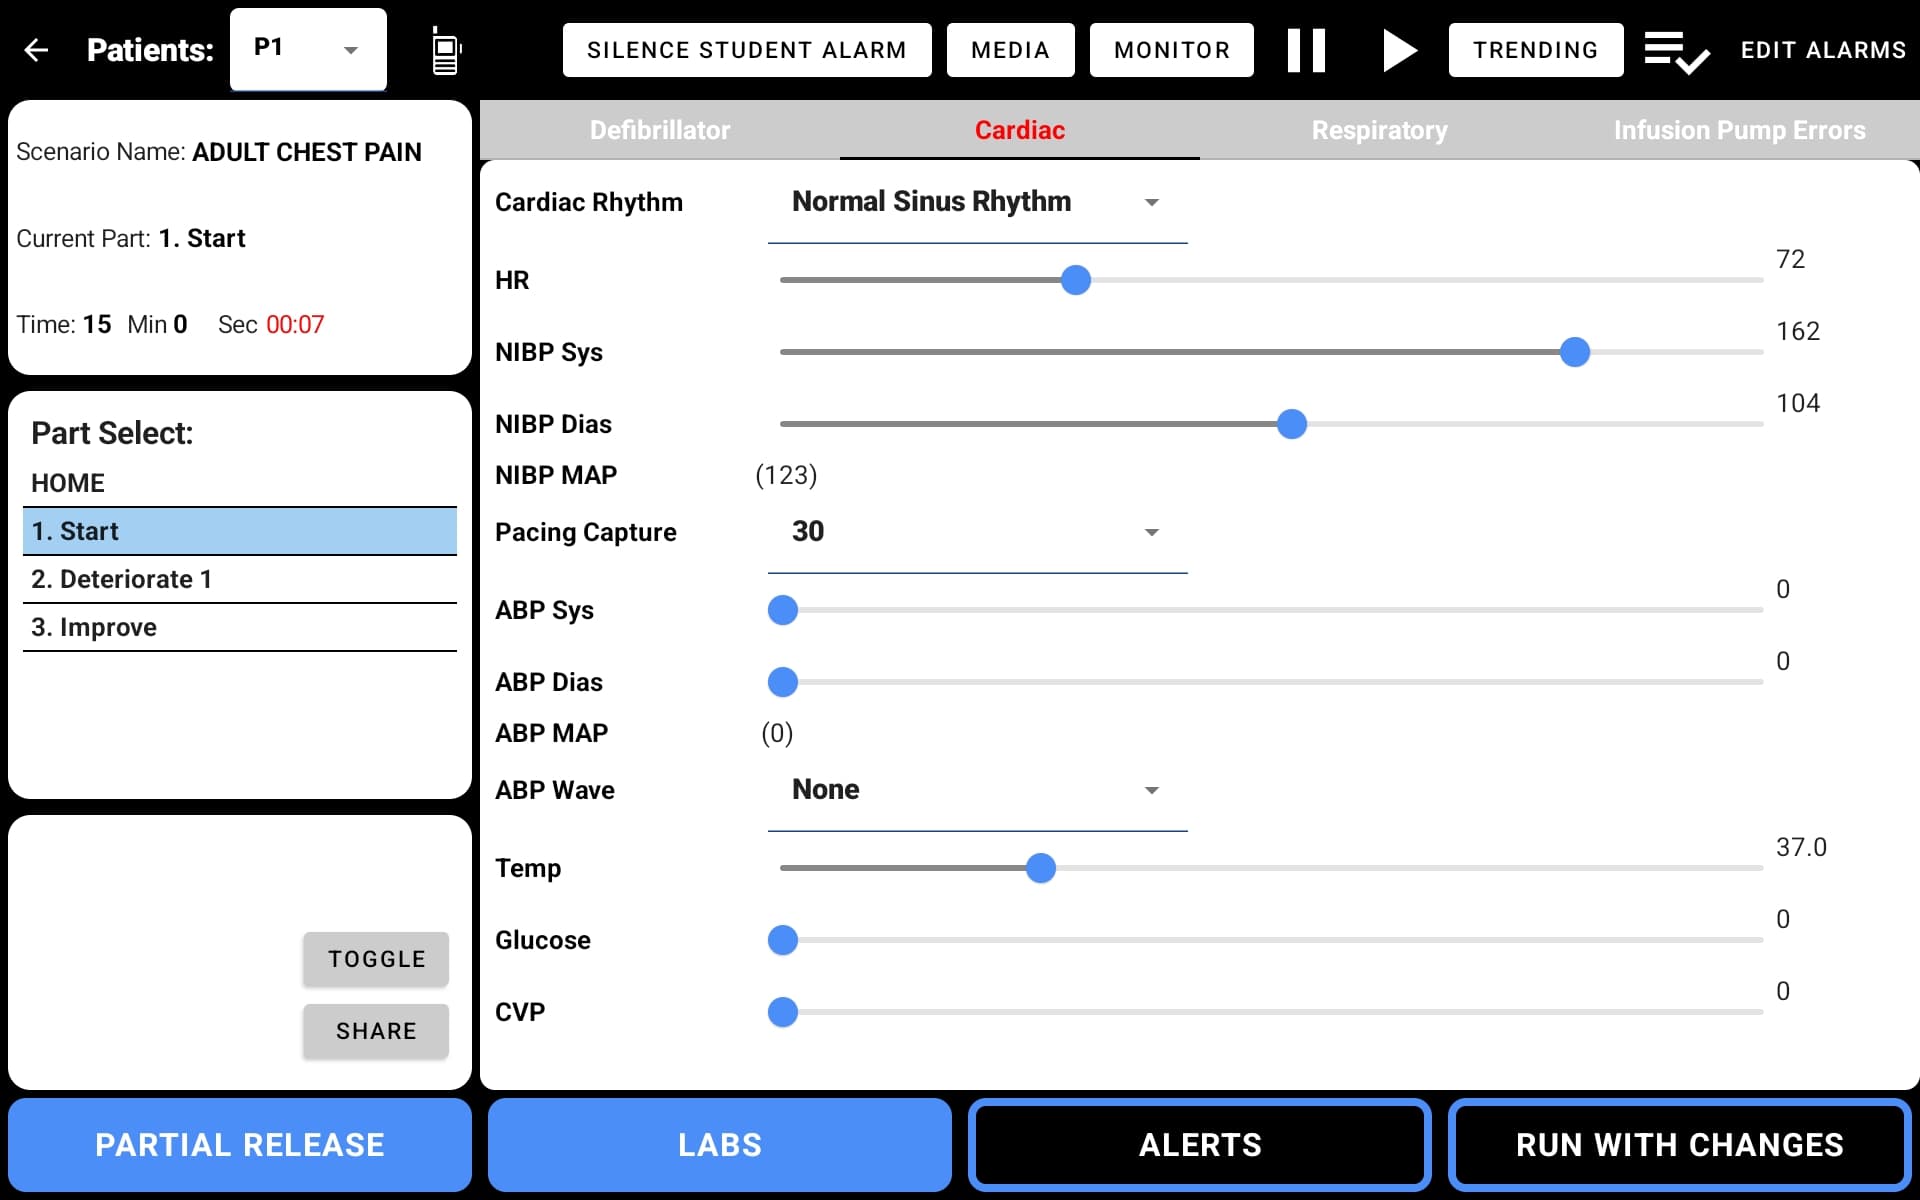
Tap Start Simulation on both the instructor and student tablets. The student tablet will display the selected monitor with live waveforms and vitals from the scenario:

The instructor tablet switches to the live simulation view where you can adjust vitals in real time:
Two Ways to Control a Scenario
Once a simulation is running, the instructor has two approaches to controlling the patient's condition:
On-the-Fly Control
Manually adjust individual vital signs in real time from the instructor tablet. This gives you complete freedom to respond to student actions as they happen.
Best for: Experienced instructors who want full control, free-form practice sessions, or when you want to improvise based on student performance.
Control by Parts
Use pre-built scenario parts — each part defines a complete physiologic state (vitals, rhythms, waveforms). Advance through parts to progress the patient's condition on a planned trajectory.
A typical scenario might include:
- HOME — baseline vitals
- Start — initial presentation
- Deteriorate — condition worsens
- Improve — recovery after intervention
Best for: Standardized testing, consistent training across groups, or when running a scenario for the first time.
You can mix both approaches
Start with pre-built parts for structure, then switch to on-the-fly adjustments when you want to improvise. See Scenario Library for more on scenario structure and Creating Scenarios for building your own.
Next Steps
Scenario Library
Browse pre-built scenarios and learn how scenario parts work.
Hospital Monitor
Learn the patient monitor interface, waveforms, and toolbar.
SimVS-X Defibrillator
Defibrillation, cardioversion, and pacing procedures.
Creating Scenarios
Build custom scenarios with granular physiology control.