Instructor Overview
A guided tour of the SimVS Hospital instructor interface — all the tools and features available to you as an instructor.
Instructor Overview
This page maps out every section of the instructor interface so you know what's available before diving into the individual feature pages.
Main Screen Layout
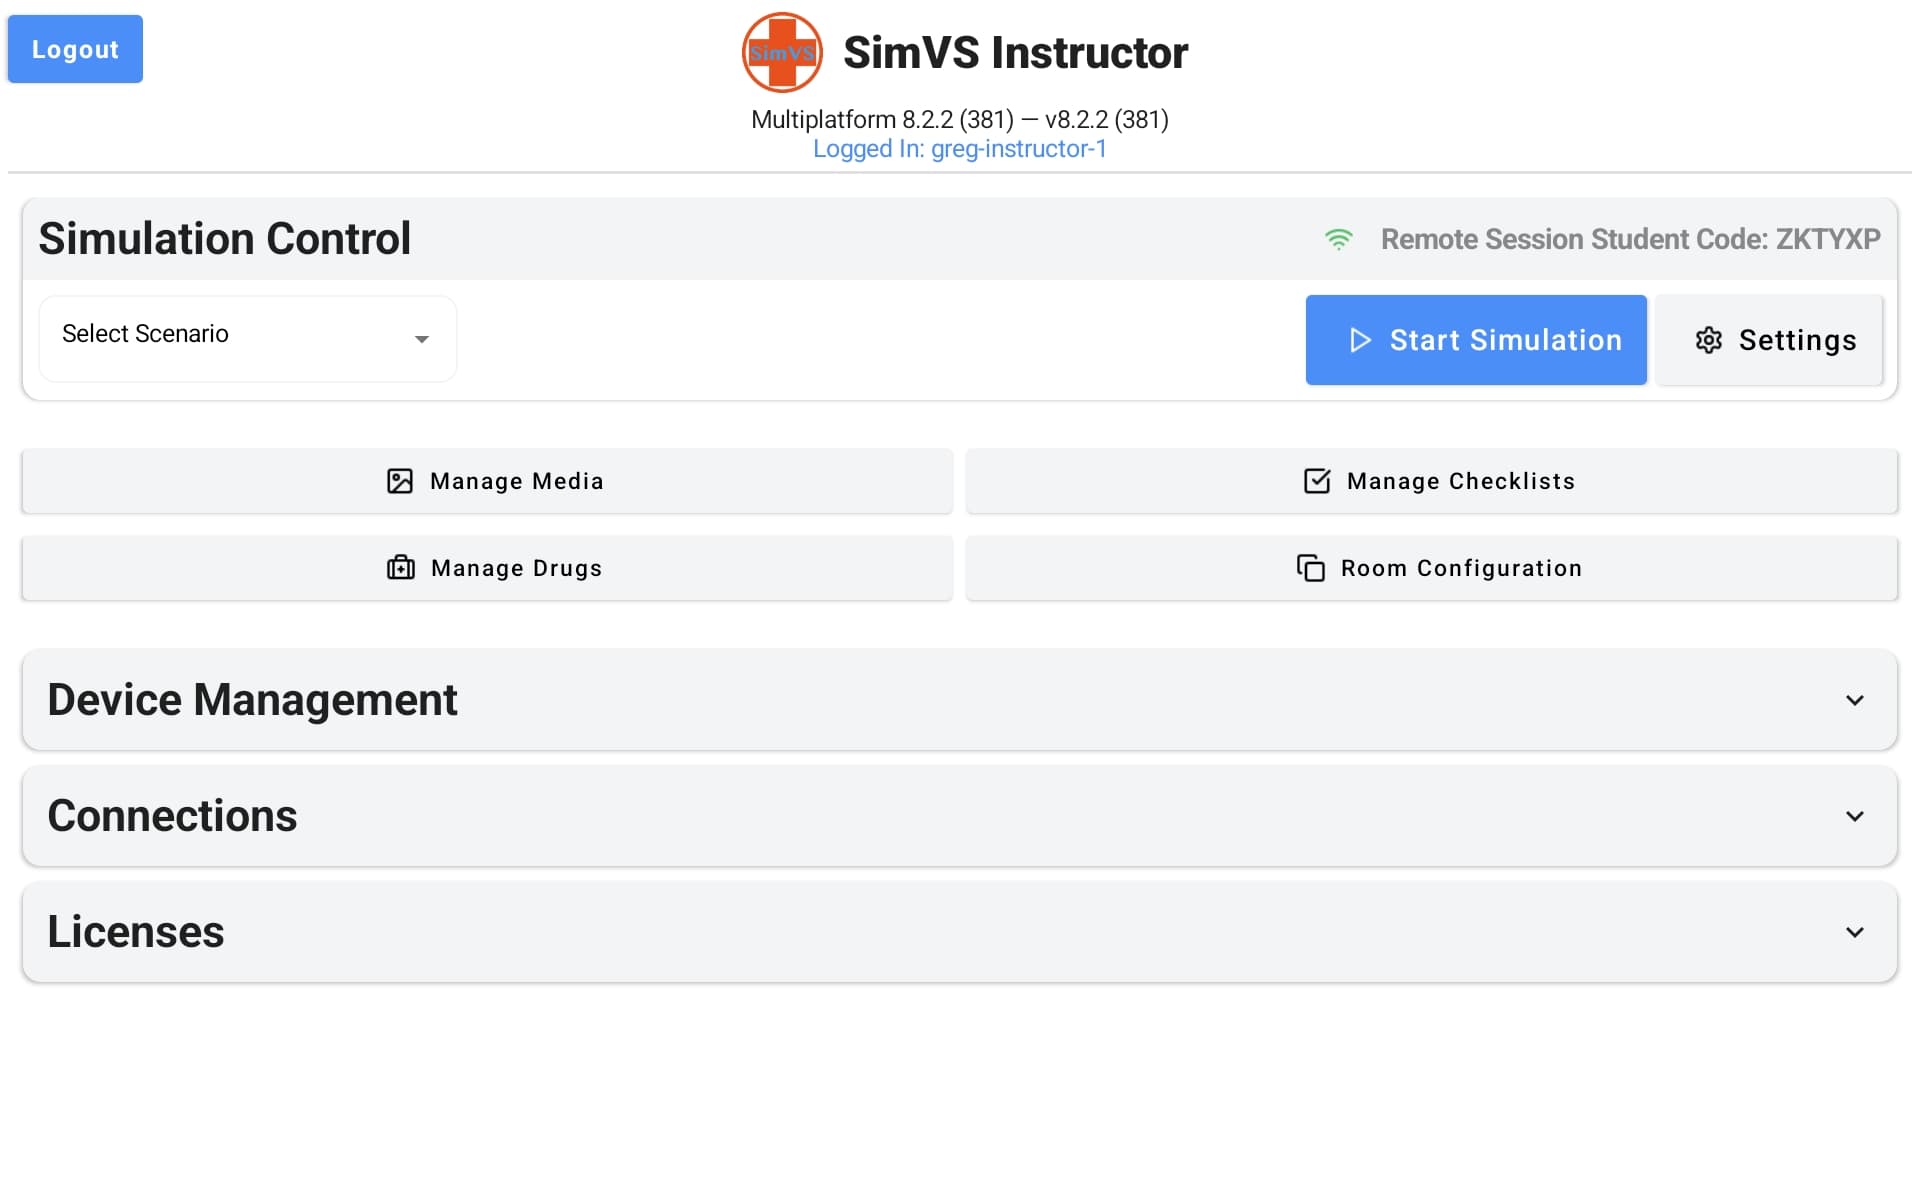
The instructor app is organized into three areas:
- Simulation Control — select and run scenarios
- Management buttons — configure media, checklists, drugs, and room settings
- Collapsible sections — device management, connections, and licenses
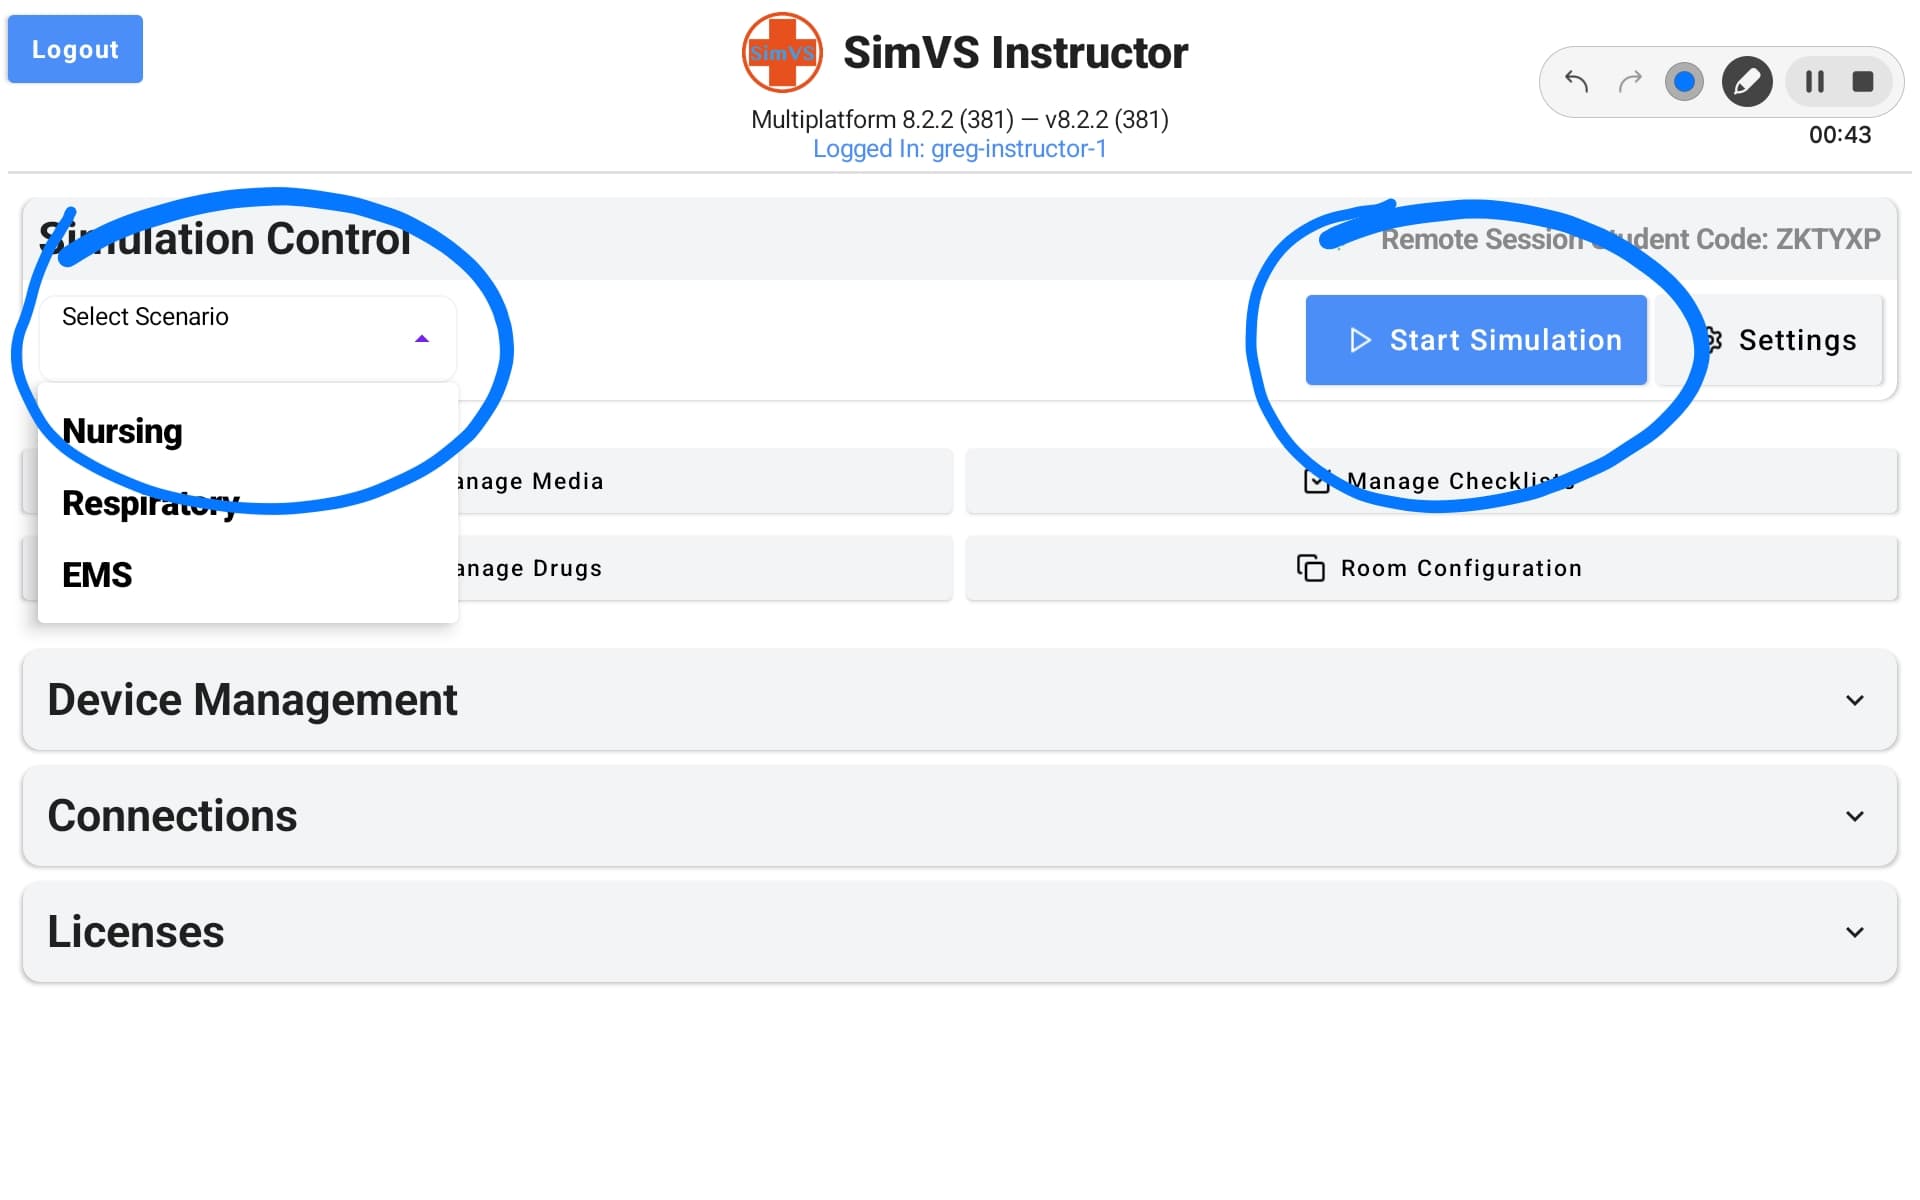
Simulation Control
The top section is where you launch and manage simulations.
| Control | Description |
|---|---|
| Select Scenario | Dropdown with all available scenarios, organized by category (such as Nursing, Respiratory, EMS, and Fetal Monitor depending on your package). See Scenario Library. |
| Start Simulation | Launches the selected scenario on all connected student devices. |
| Settings | Configure simulation preferences — display options, timing, and behavior. |
| Remote Session Student Code | Displayed in the top-right corner. Share this code with students so they can connect in Server Mode. See Setup & Licensing. |
Management Features
Four buttons below the Simulation Control section give you access to content management:
| Feature | What it does | Learn more |
|---|---|---|
| Manage Media | Organize media folders, upload custom images, and send 12-lead EKGs to student displays during a simulation. | Media & Folders |
| Manage Checklists | Create, edit, and assign performance checklists. Score student actions during a simulation and review in debriefing. | Checklists & Debriefing |
| Manage Drugs | Configure the drug library available during simulations — add, remove, or modify available medications. | — |
| Room Configuration | Set up the virtual room environment — configure which devices and displays are available to students. | — |
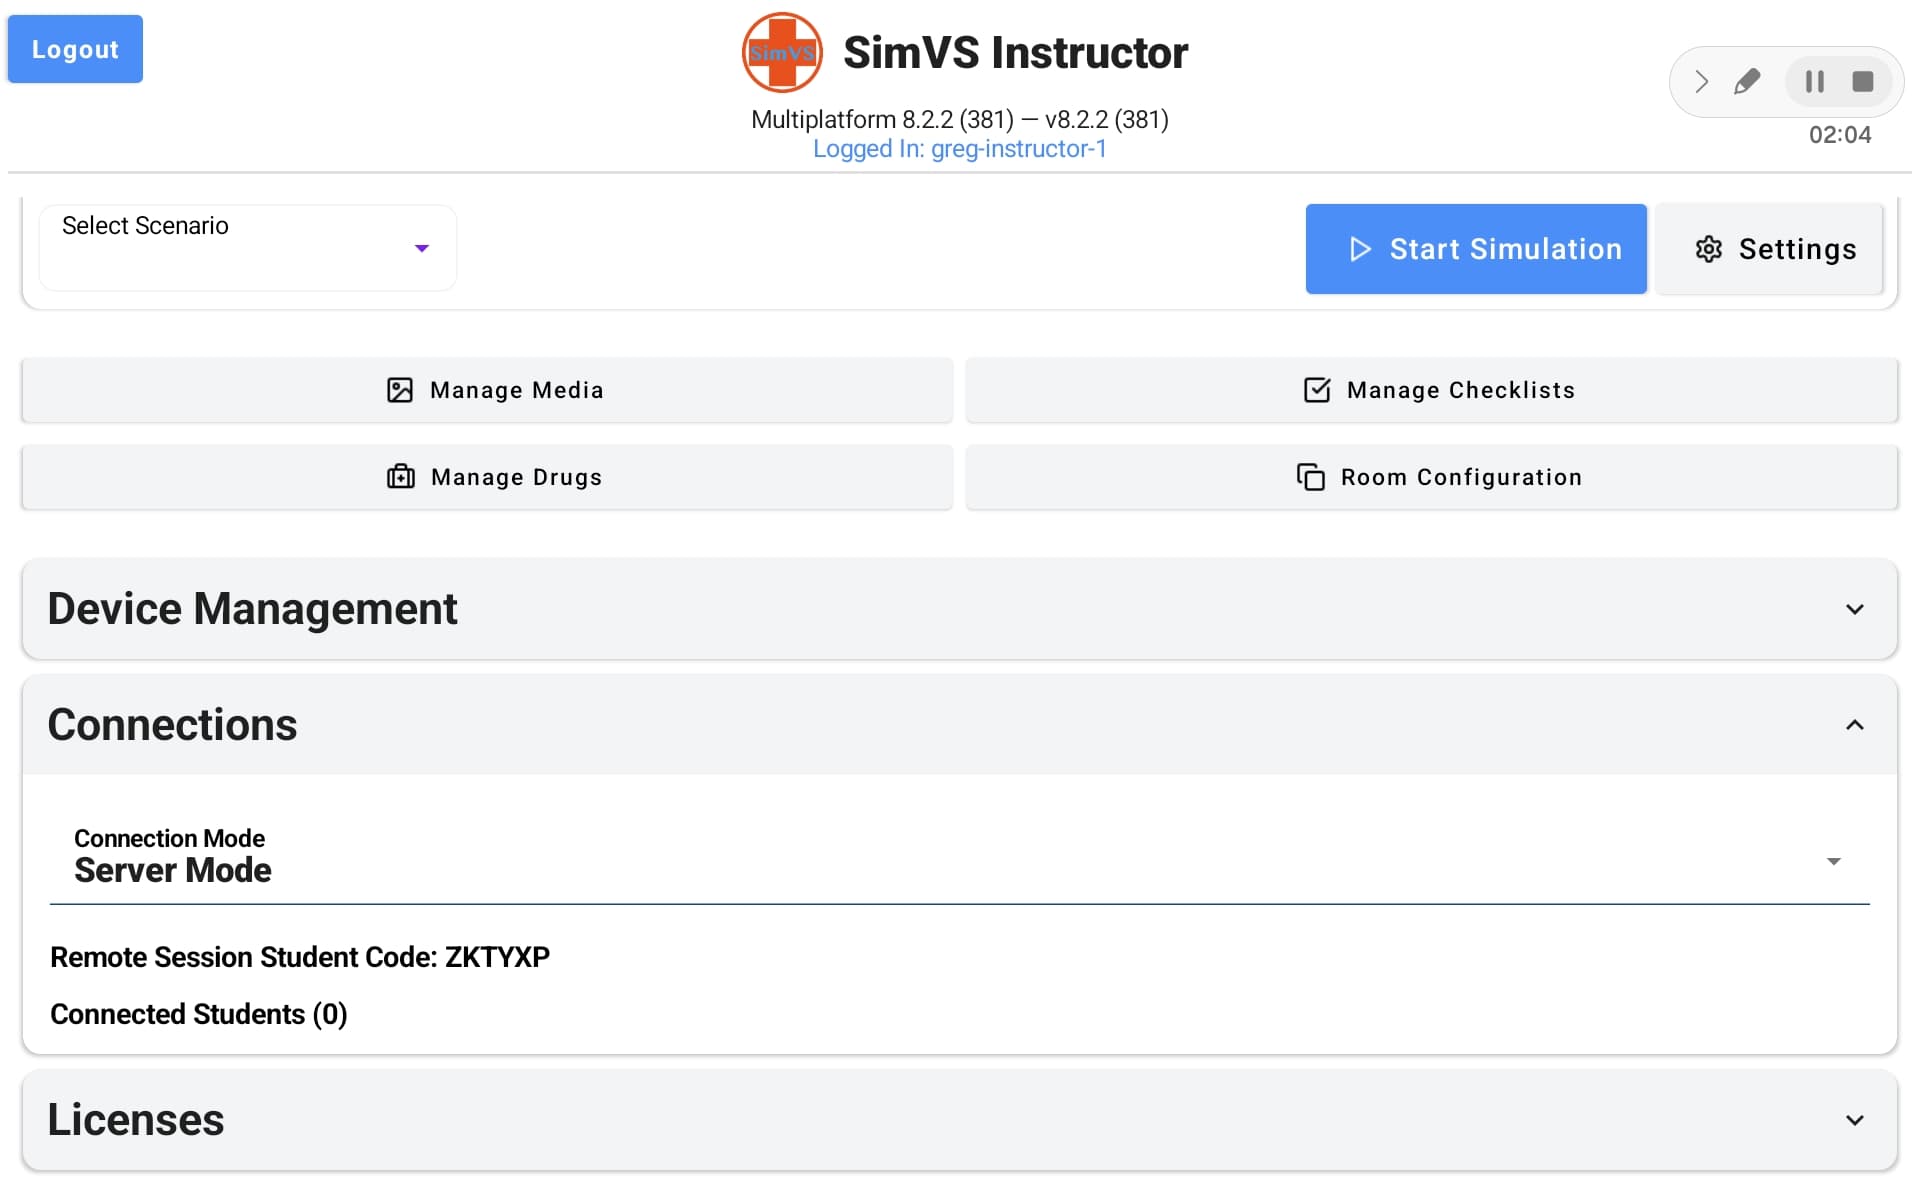
Device Management
The Device Management collapsible section lets you view and manage student devices connected to your session. Tap to expand.
Connections
The Connections section shows your current connection mode and connected students. See Device Pairing for a detailed walkthrough.
Licenses
The Licenses section shows your active license(s) and lets you add new ones. Your license determines which monitor types, scenarios, and features are available.
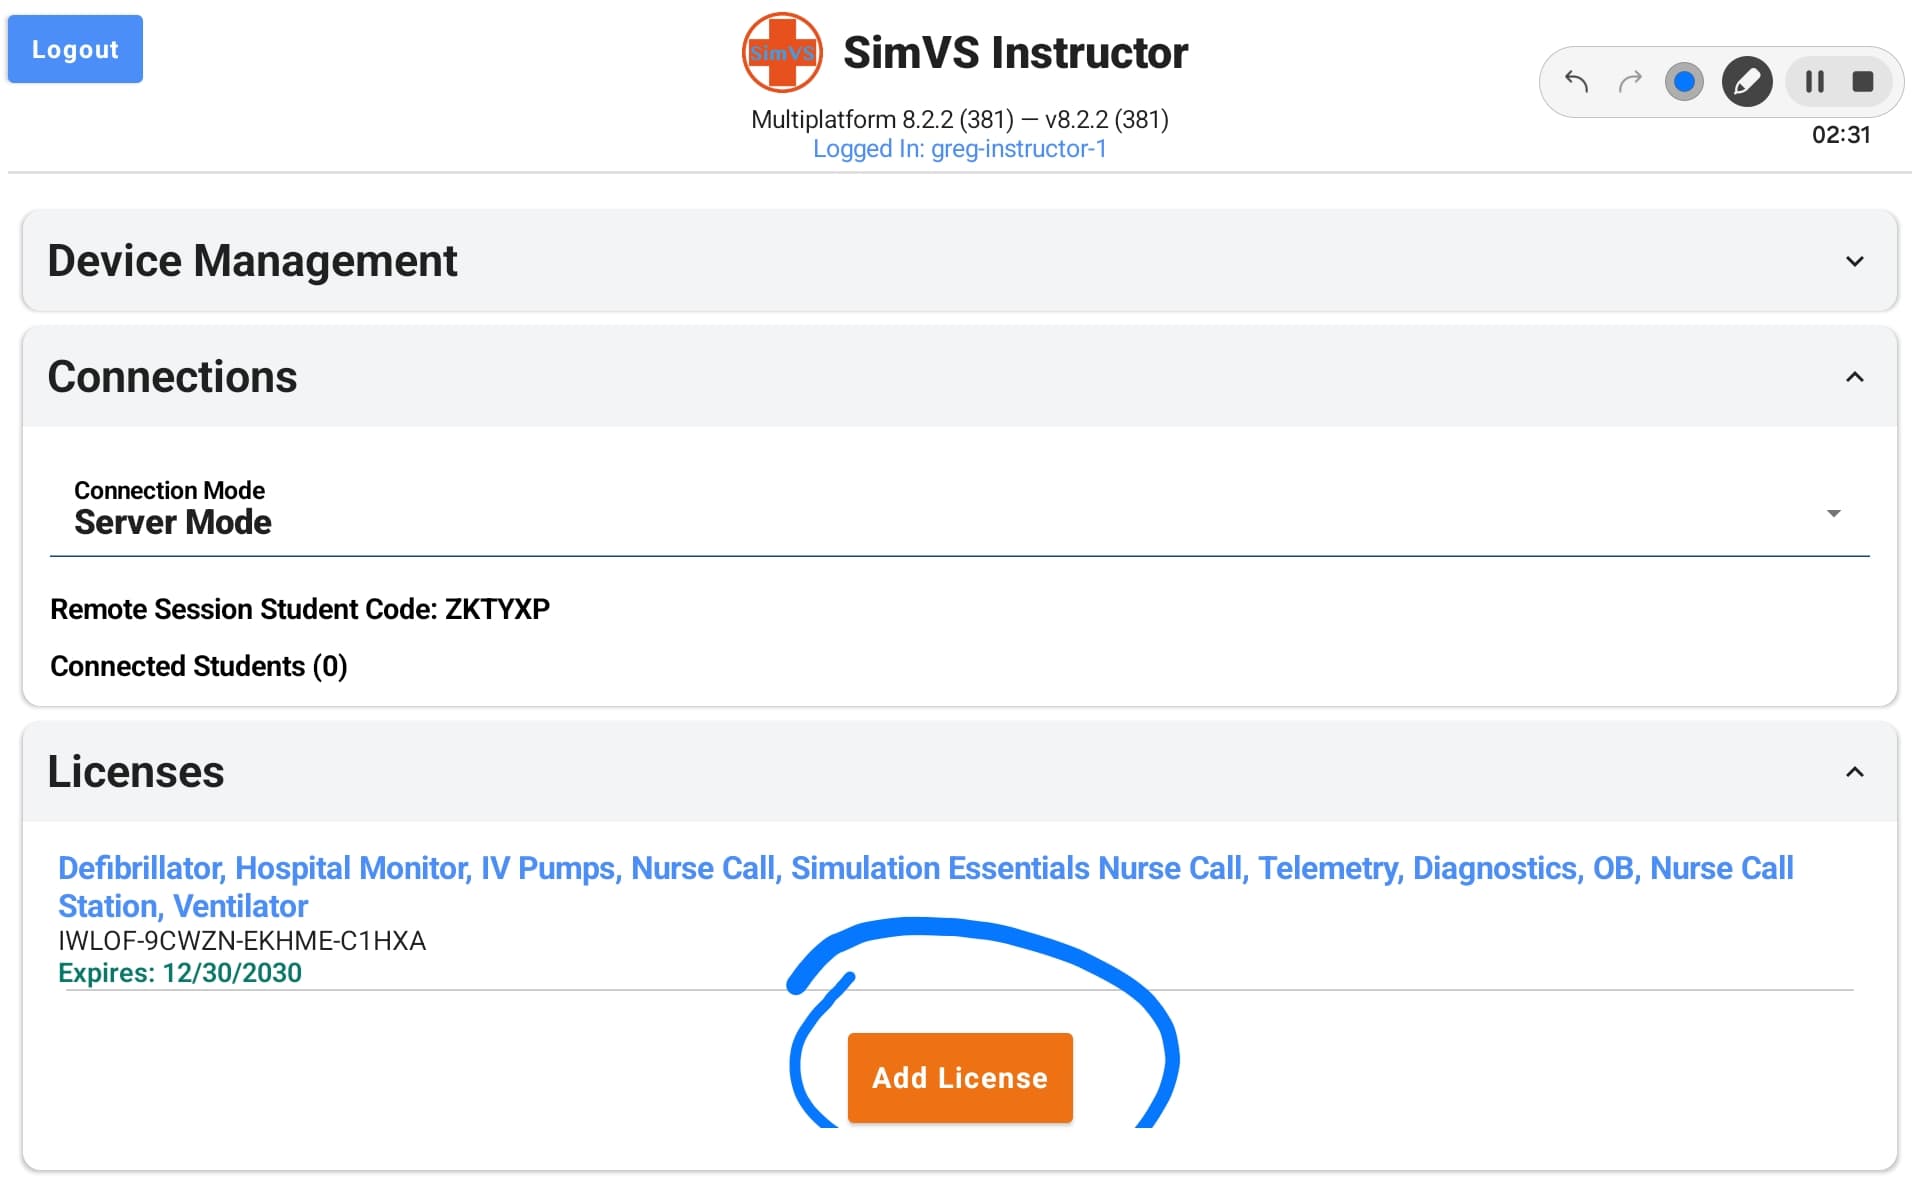
See Setup & Licensing for details on viewing and adding licenses.
During a Live Simulation
Once a scenario is running, the instructor interface changes to show real-time controls:
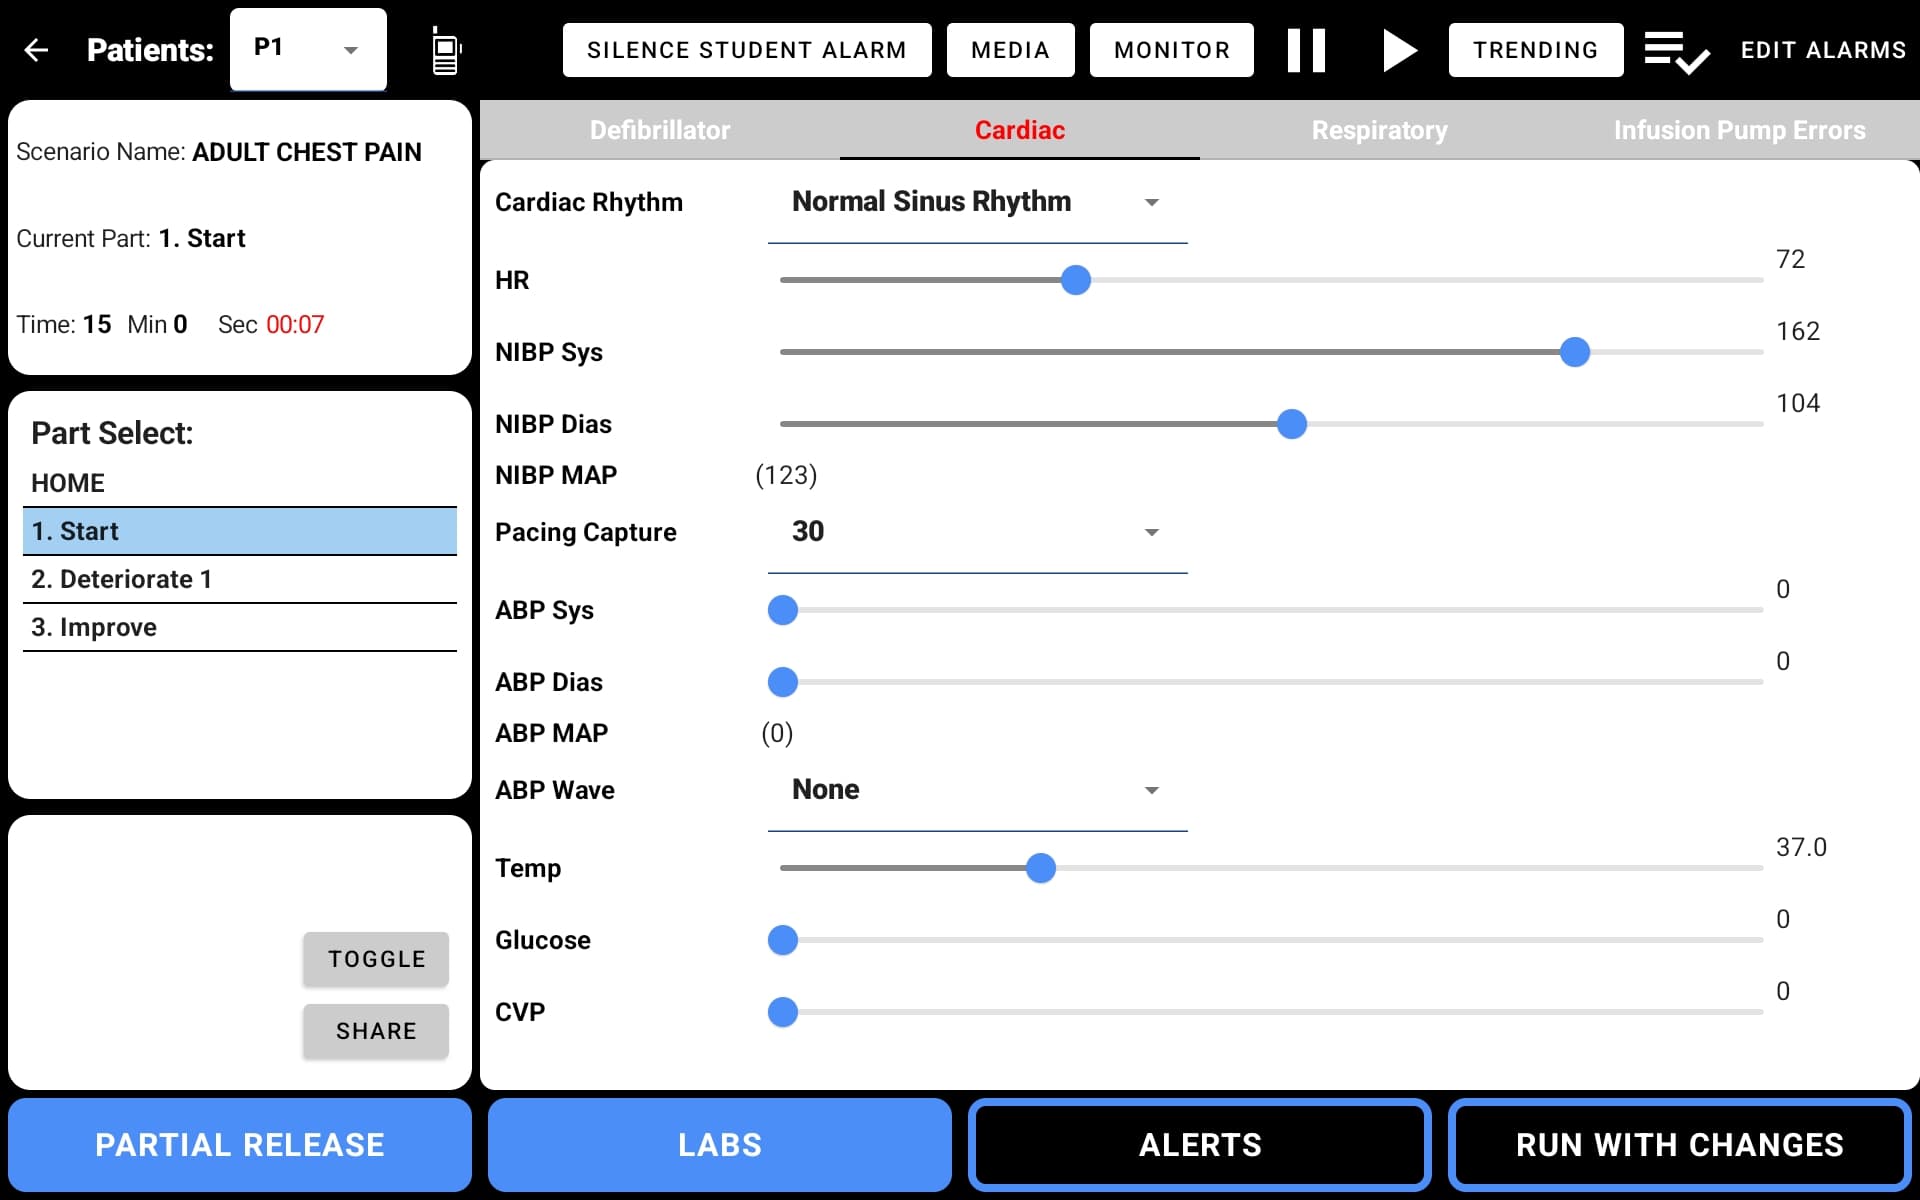
From the live simulation view you can:
- Adjust vitals on the fly — manually change heart rate, blood pressure, SpO2, and other parameters in real time
- Advance scenario parts — move to the next pre-built scenario state (e.g., Deteriorate, Improve)
- Send media — push 12-lead EKGs or images to the student display
- Monitor checklists — track student performance against checklist items
- Trigger alarms — configure and activate physiologic alarms on the student monitor
- Control trending — set parameters to trend over time within the current scenario part
On-the-fly vs. Parts
You can mix both control styles during a simulation. Start with pre-built parts for structure, then switch to manual adjustments when you want to improvise. See Quick Start — Two Ways to Control a Scenario for more.
Feature Quick Reference
| Feature | Page | Description |
|---|---|---|
| Scenario Library | Scenarios | Browse, launch, and advance through pre-built scenarios |
| Creating Scenarios | Creating Scenarios | Build custom scenarios with parts and physiology control |
| Partial Release | Partial Release | Release individual parameters for student control |
| Checklists | Checklists | Performance scoring and debriefing tools |
| Media | Media | 12-lead EKGs, media folders, and custom images |
| Alarms | Alarms | Physiologic alarm configuration |
| Telemetry | Telemetry | Multi-patient telemetry display |
| Trending | Trending | Time-based parameter trending |